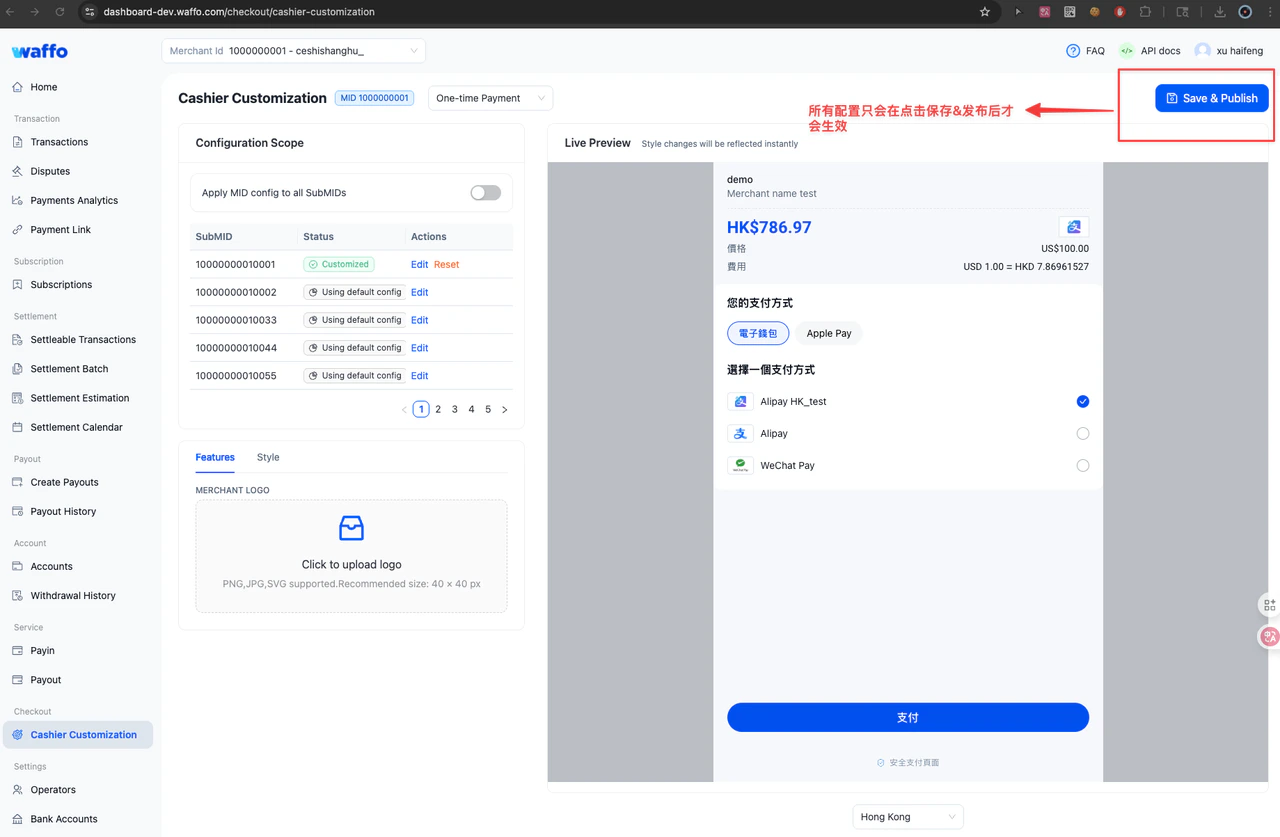
API parameters still have higher priority than Portal configuration. If the order creation request includes
paymentInfo.cashierAppearance, that order uses the style passed in the API request.Open the configuration page
1
Log in to Merchant Portal
Log in with an account that has the required permissions.
2
Open cashier customization
Go to Checkout → Cashier Customization.
3
Update settings
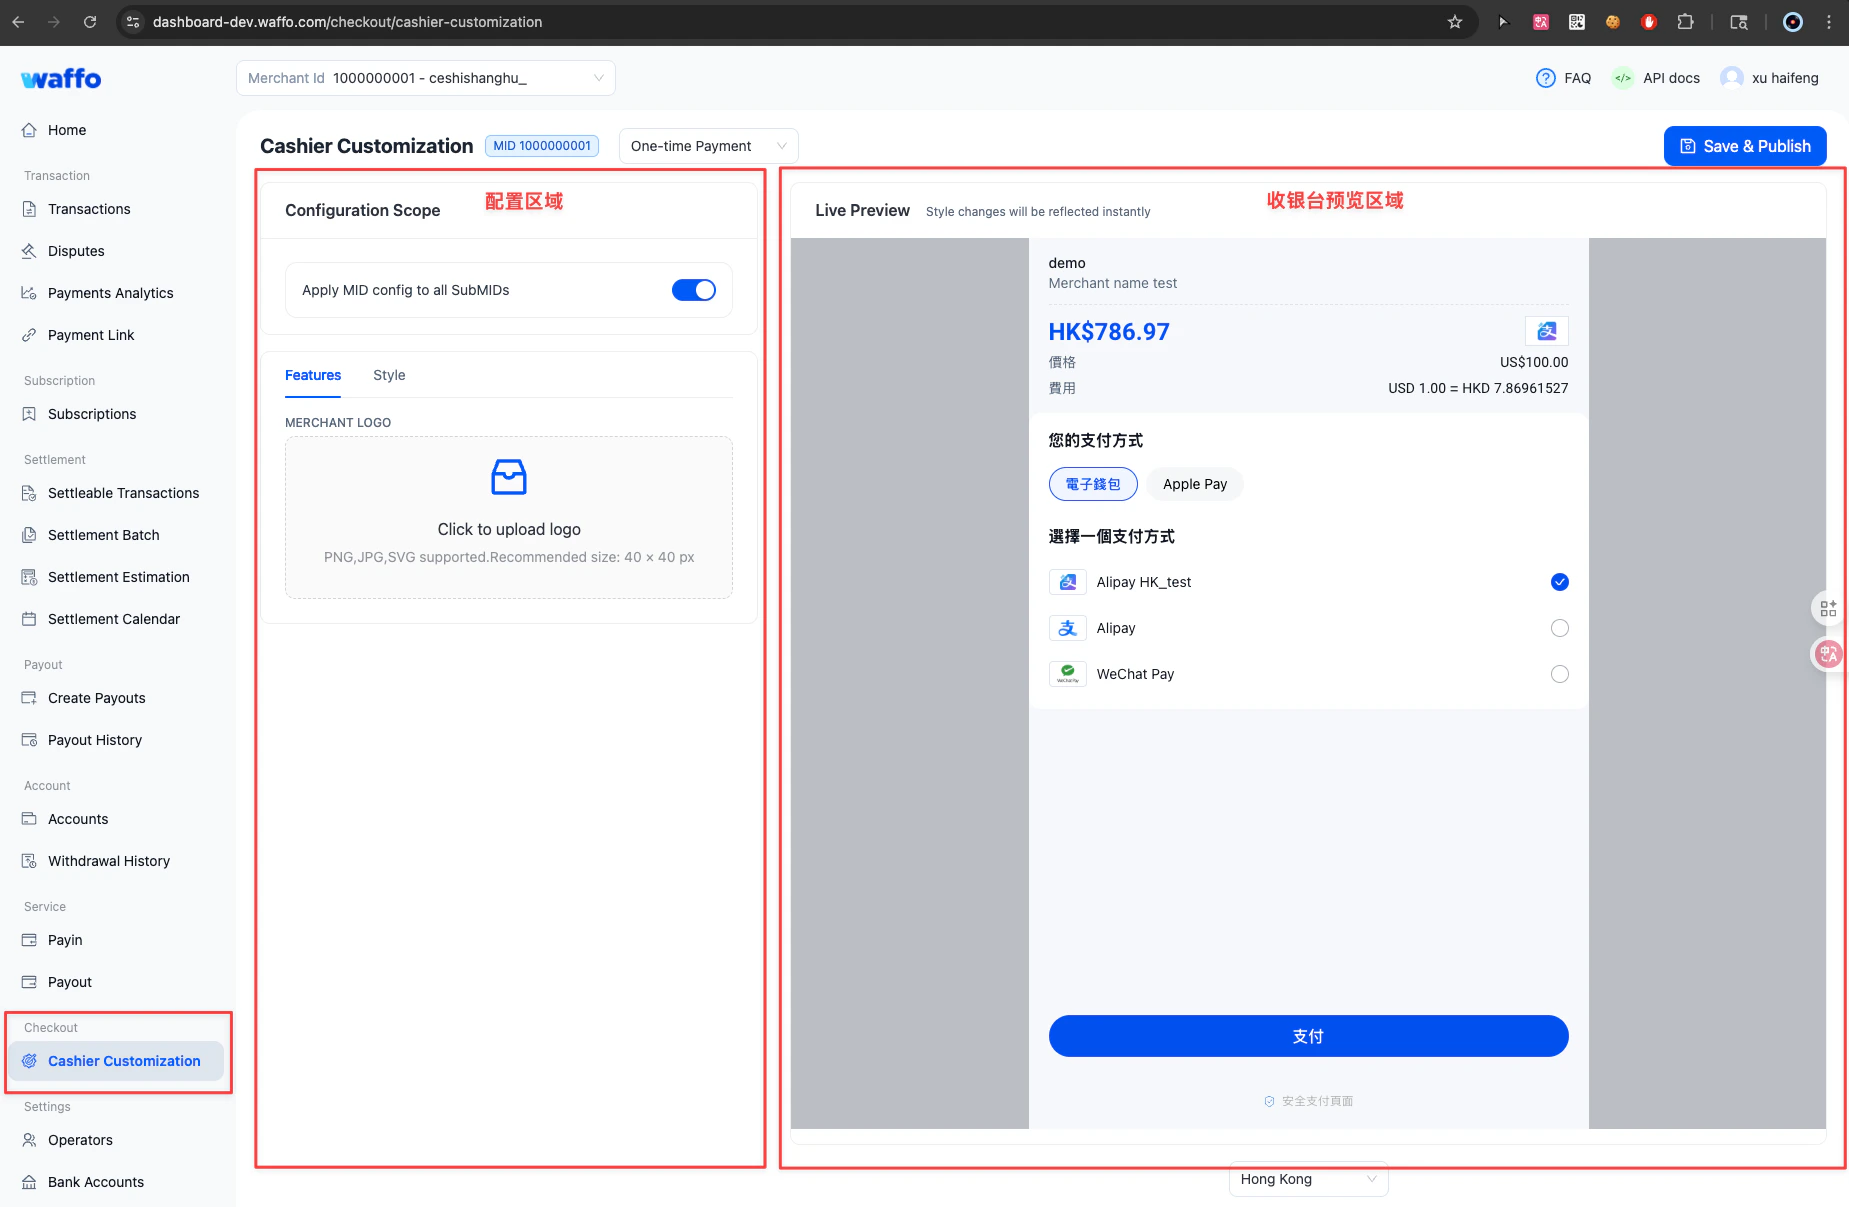
Use the left configuration panel to update the Logo, theme colors, base font size, and corner radius.
4
Preview the cashier
Use the preview area on the right side to check the cashier display.
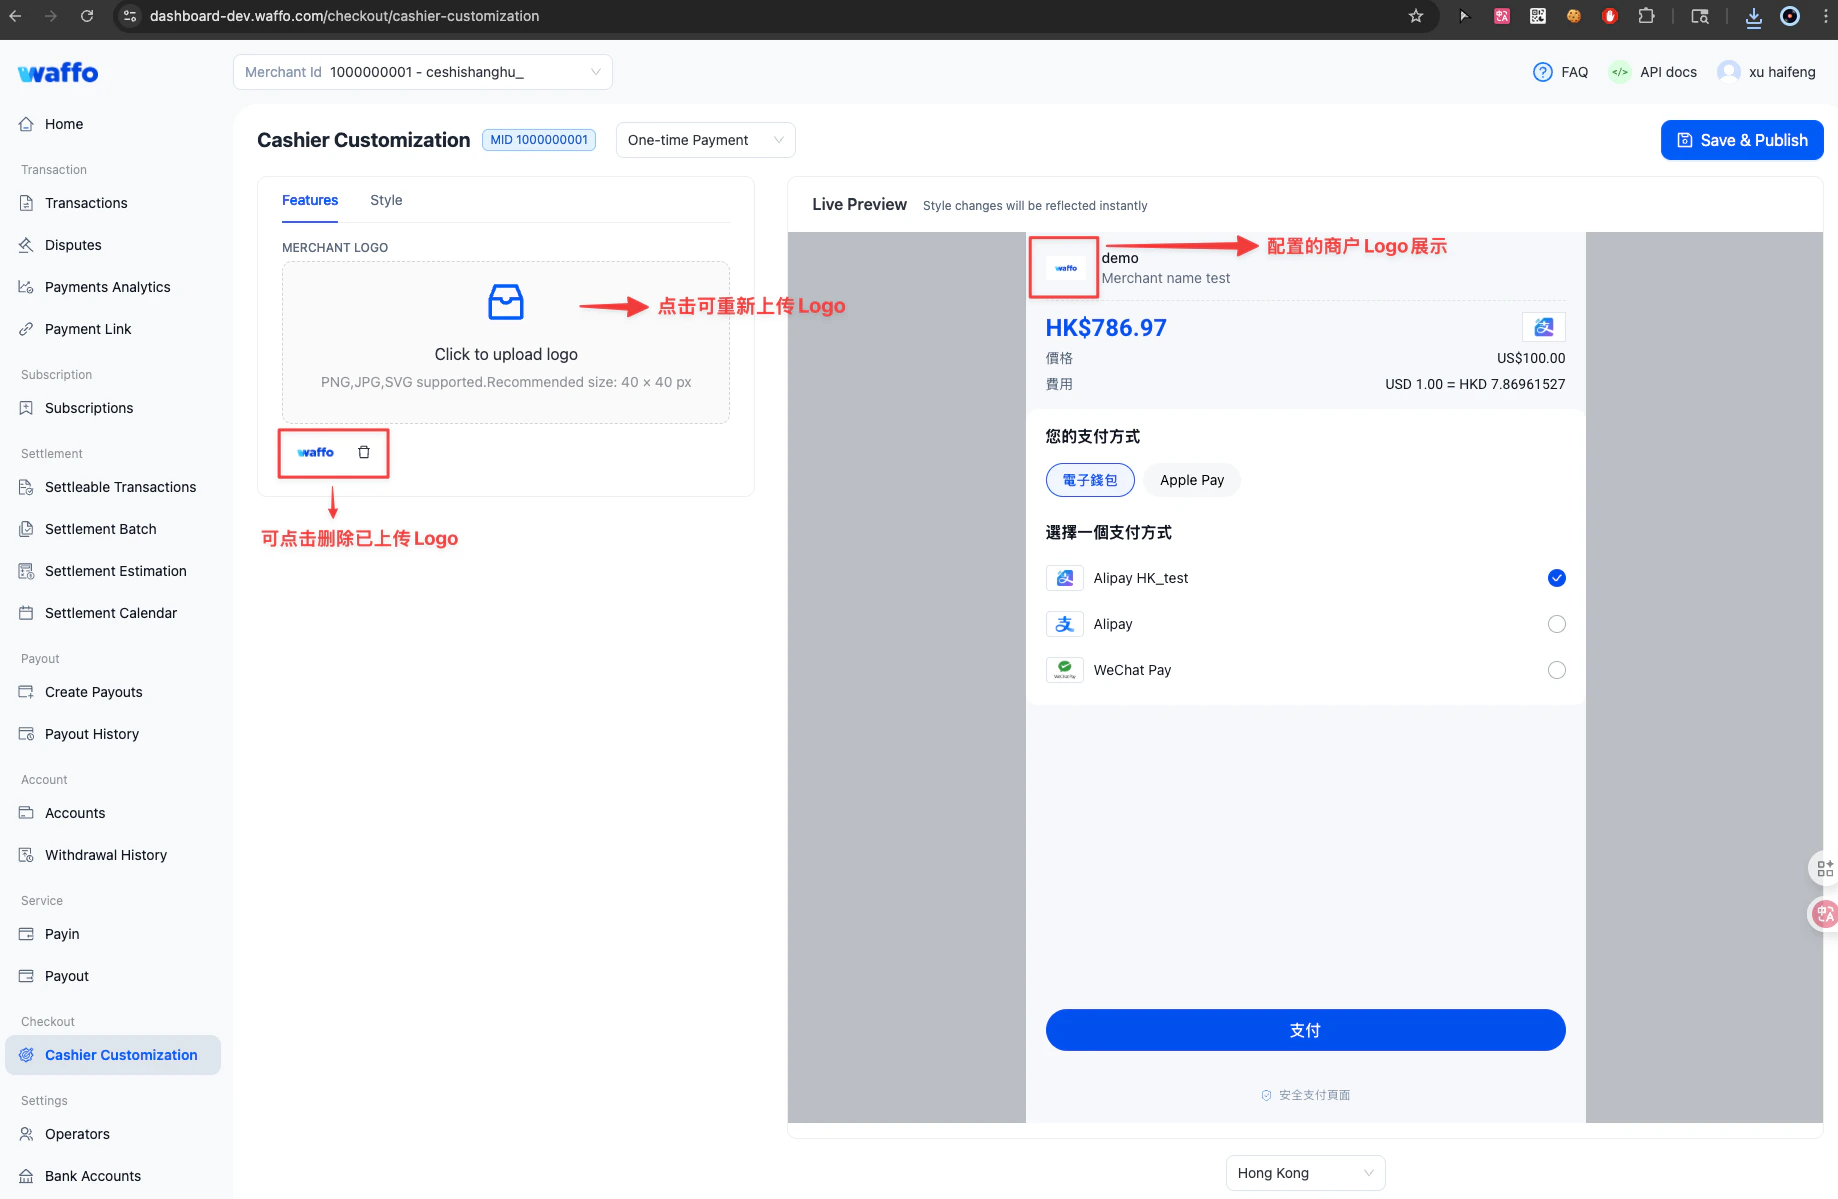
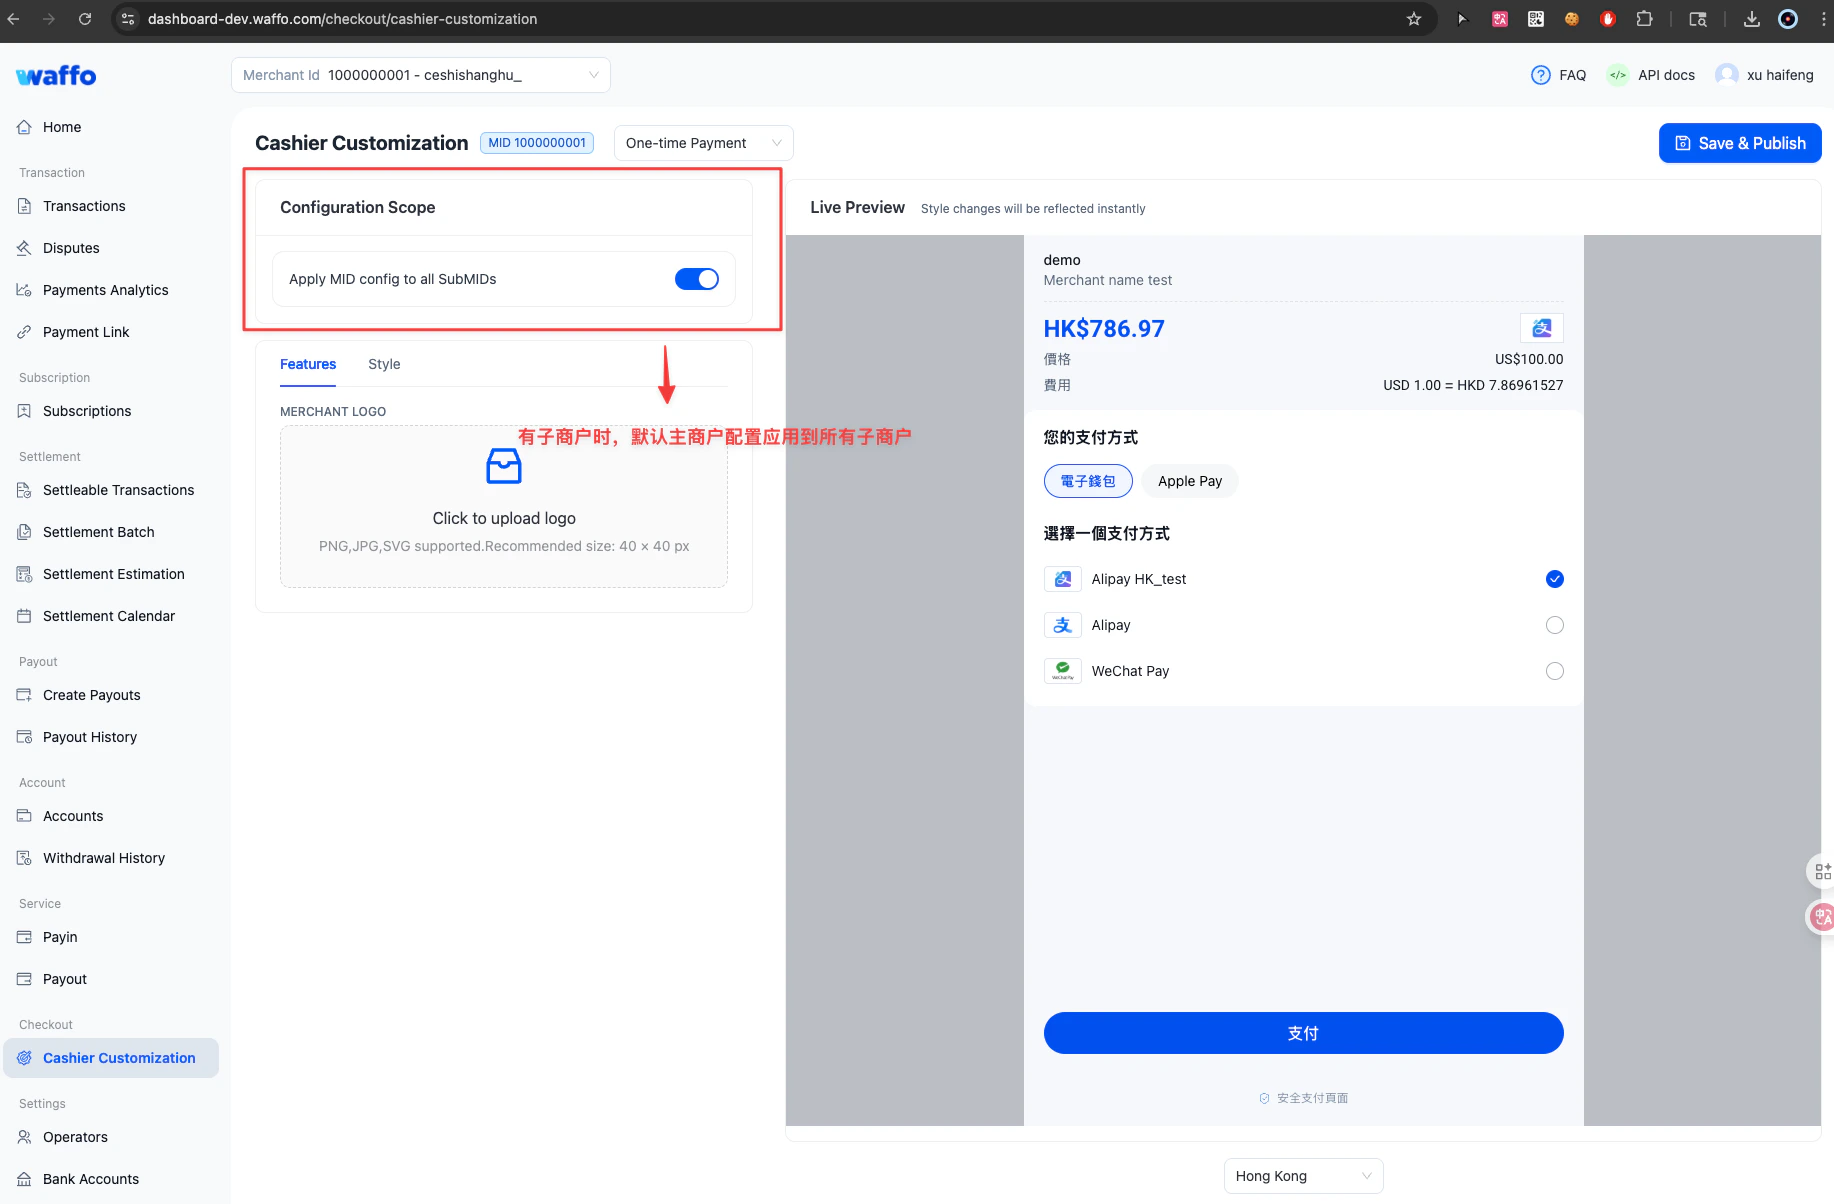
Upload merchant Logo
Upload the cashier Logo on the Features page.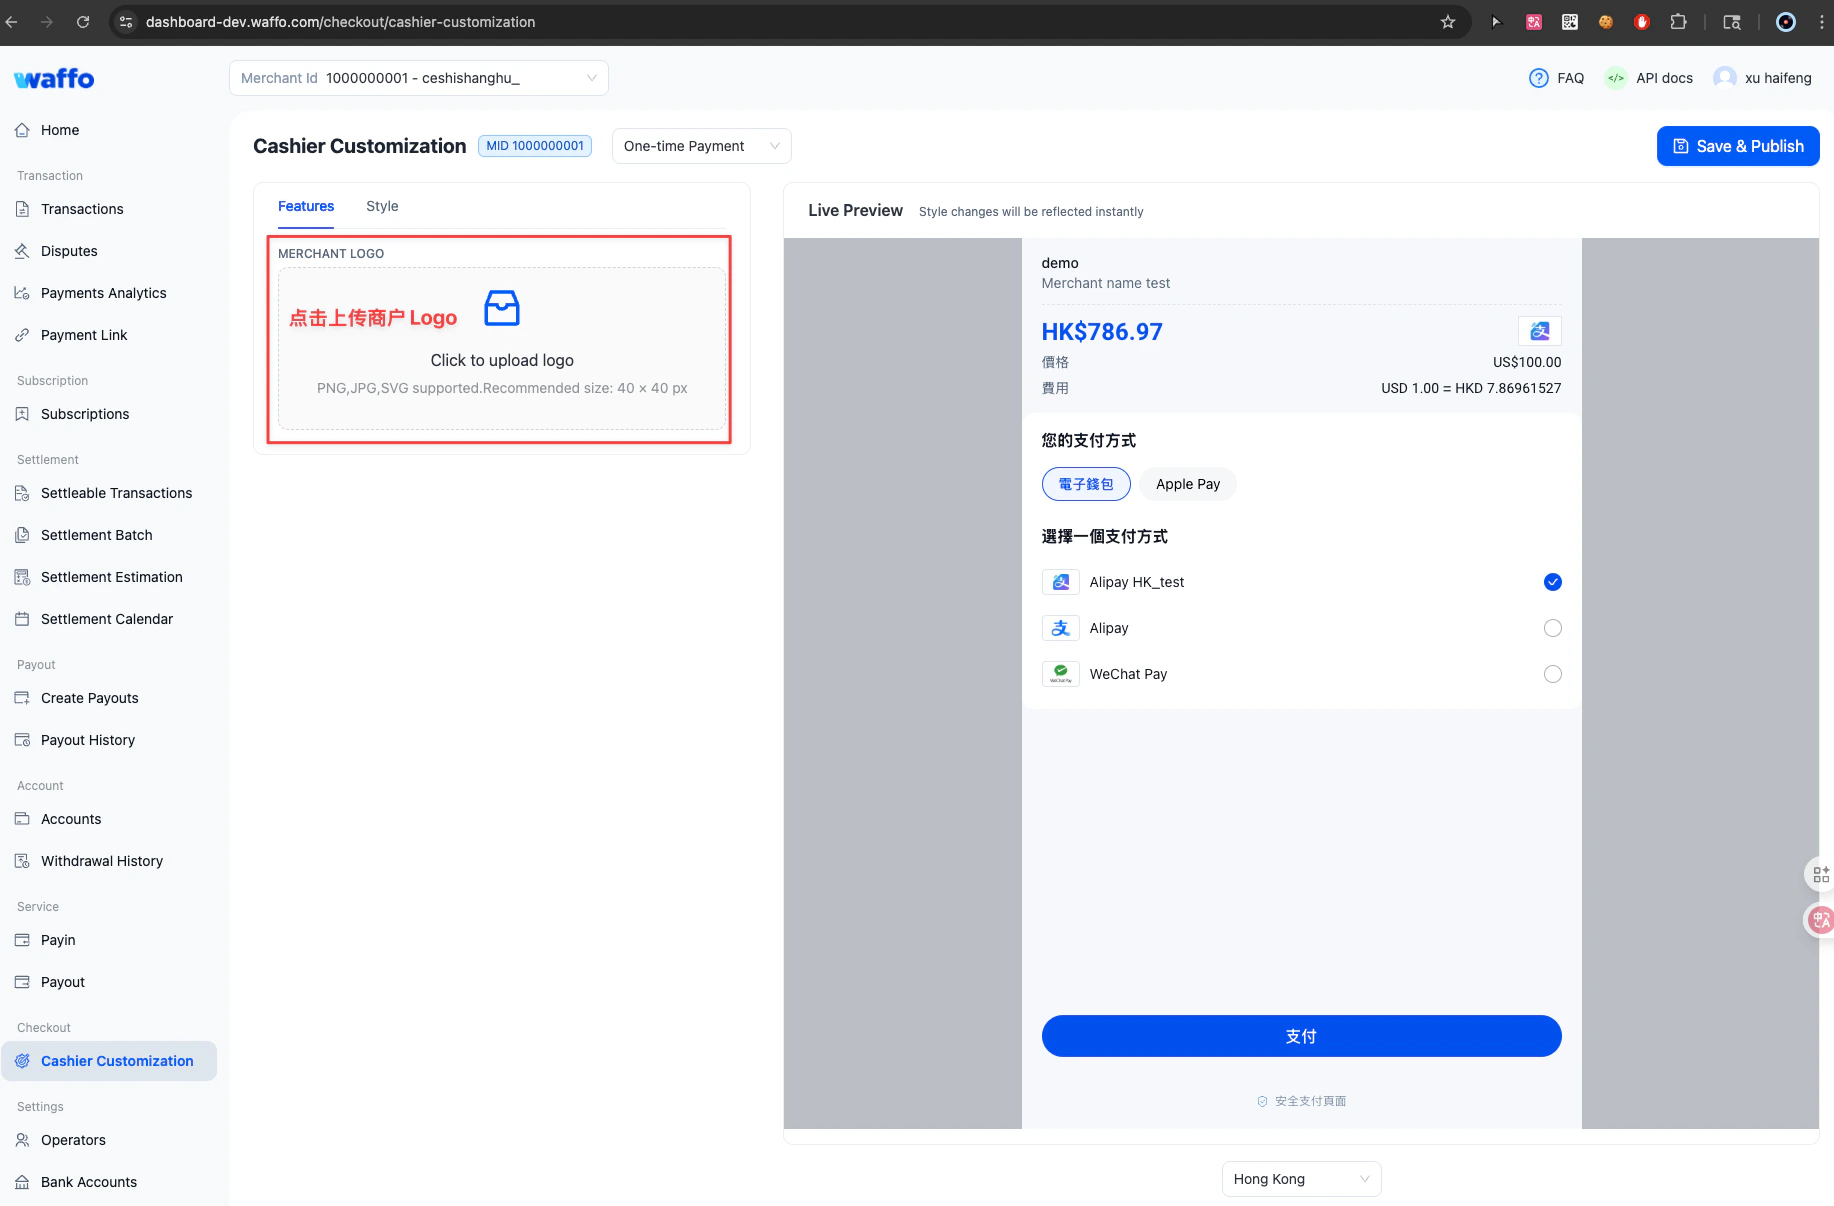
Set cashier style
Configure the cashier theme on the Style page. You can apply a preset theme or customize colors and style parameters based on your brand guidelines.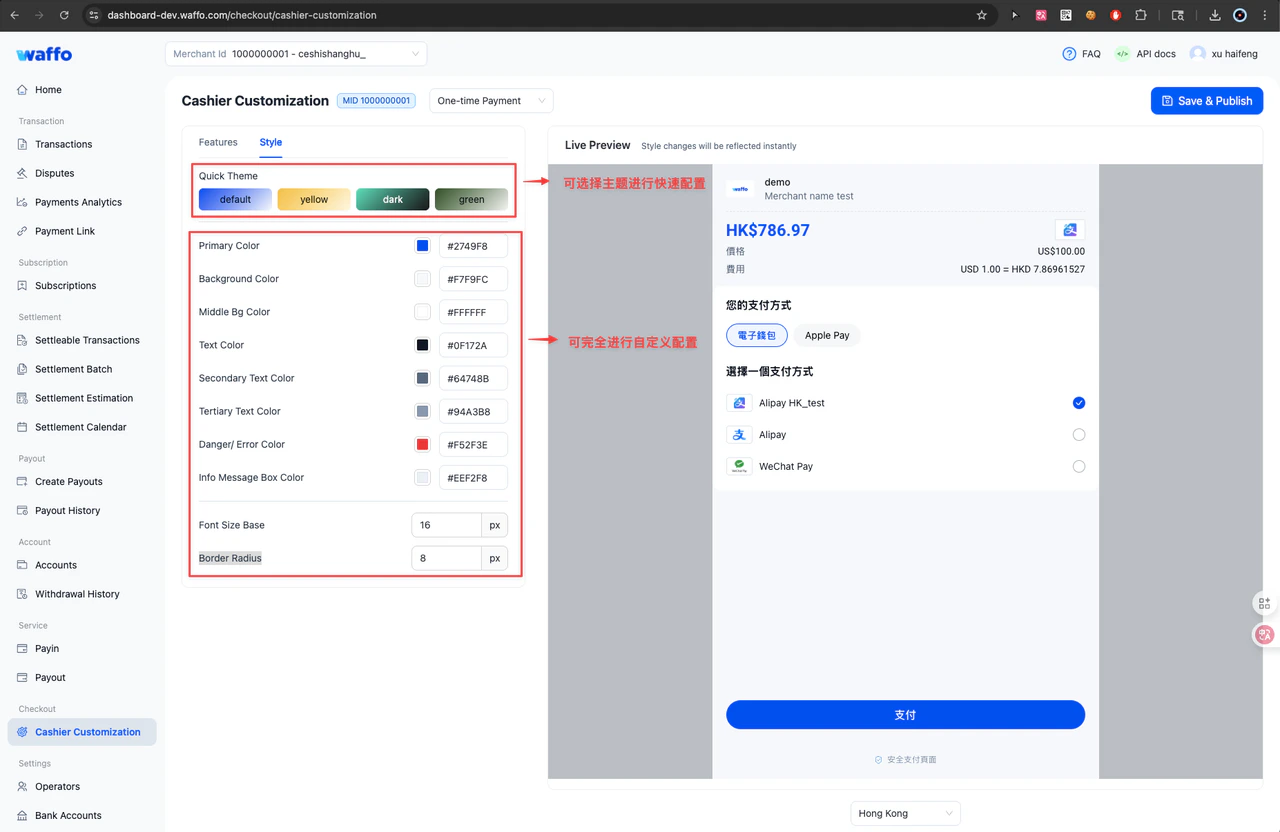
Color fields
Style parameters
Set the payment method ranking scope
In Cashier Ranking, use Rank payment methods by country to control the payment method ranking scope. By default, the system ranks payment methods based on their popularity in each country or region. After you customize the order on this page, click Save & Publish to apply the new ranking.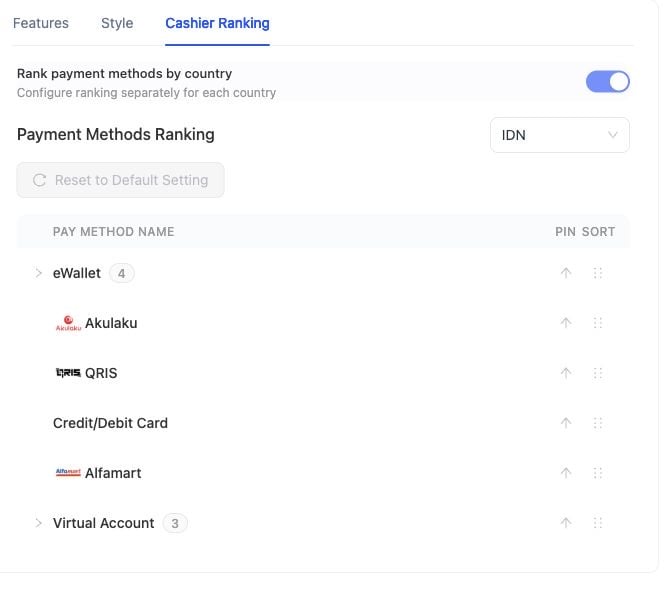
When the switch is on, the country or region selector is available; this example selects IDN.
Turning off the switch does not disable payment method ranking. It replaces separate country or region rankings with one shared ranking.
1
Select a product type
Select the product type that you want to configure at the top of the page.
2
Select the ranking scope
When the switch is on, select a country or region and update the payment method order for that scope. To use a shared ranking, turn off the switch and click Turn off in the confirmation dialog.
3
Save and publish
Check the preview on the right, then click Save & Publish.
Move a payment method out of a group
In Cashier Ranking, you can move a supported payment method from its original group to the top-level ranking area so that it appears as a separate item.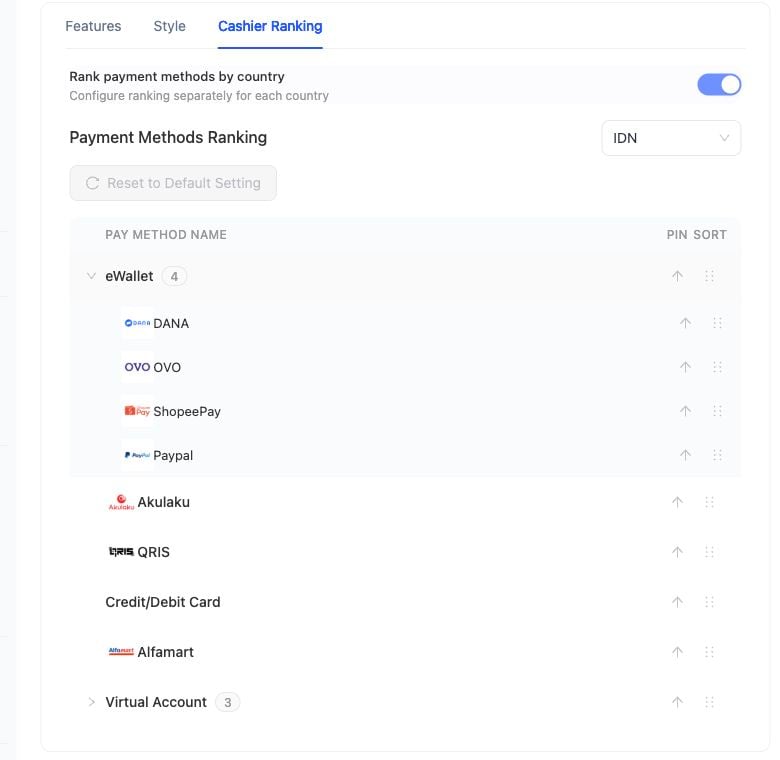
The eWallet group is expanded. DANA and other items are inside it, while Akulaku and QRIS are at the top level. Use each row's handle on the right to move a payment method.
1
Expand the payment method group
Expand the group that contains the payment method.
2
Drag the payment method to the top level
Use the drag handle on the right side of the payment method to move it to the target position in the top-level list.
3
Verify the separate item
Confirm that the payment method shows Pulled out and identifies its original group with From. Reorder it in the top-level list as needed.
4
Save and publish
Check the preview on the right, then click Save & Publish.
The combined credit and debit card group does not support moving an individual payment method out of the group.
Preview the result
As you update settings, the preview area on the right side shows the cashier result in real time. You can switch the country or region to check the display for different currencies, languages, and payment methods.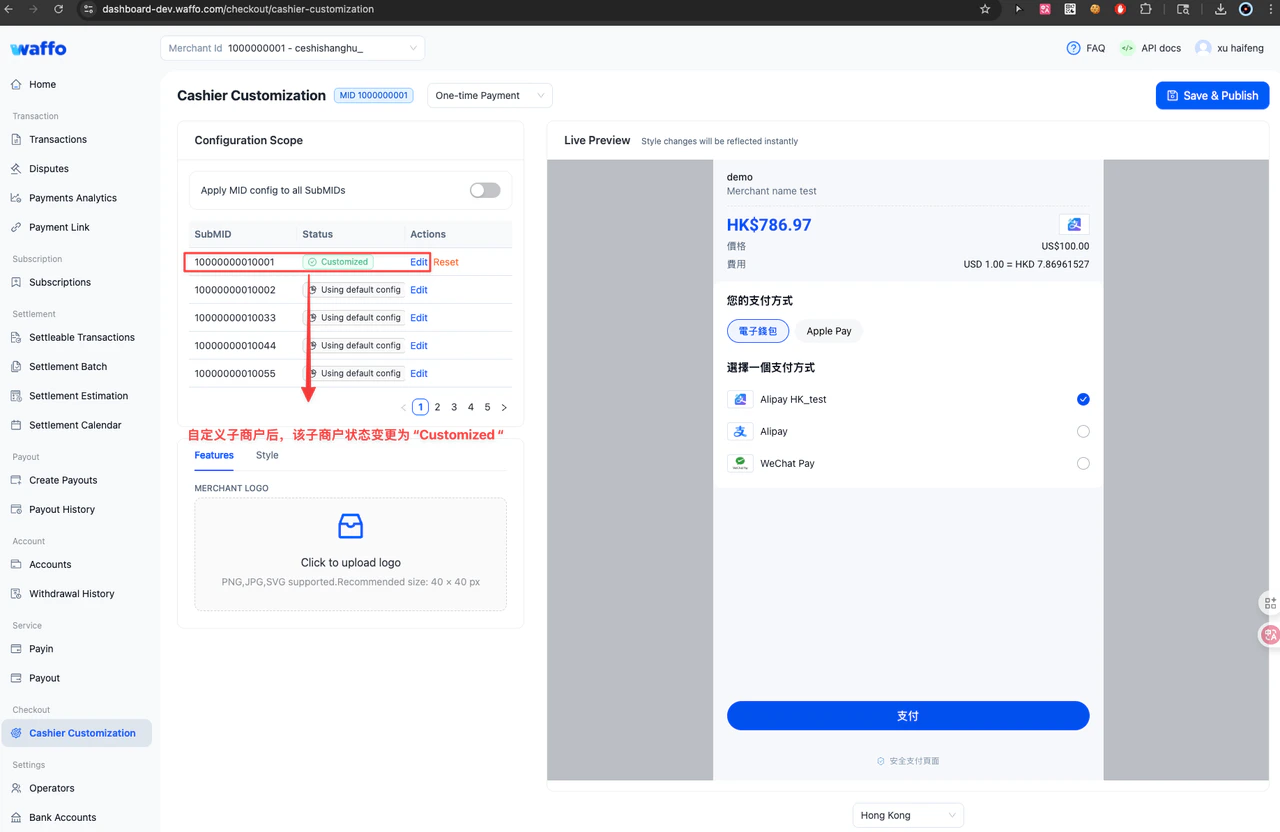
Some style fields may not appear immediately in the current preview. This usually does not mean the configuration failed. Cashier page structure can vary by country, region, or product type. If the current preview page does not contain the affected element, the style change will not be visible. Switch to another country, region, or product type to continue checking.
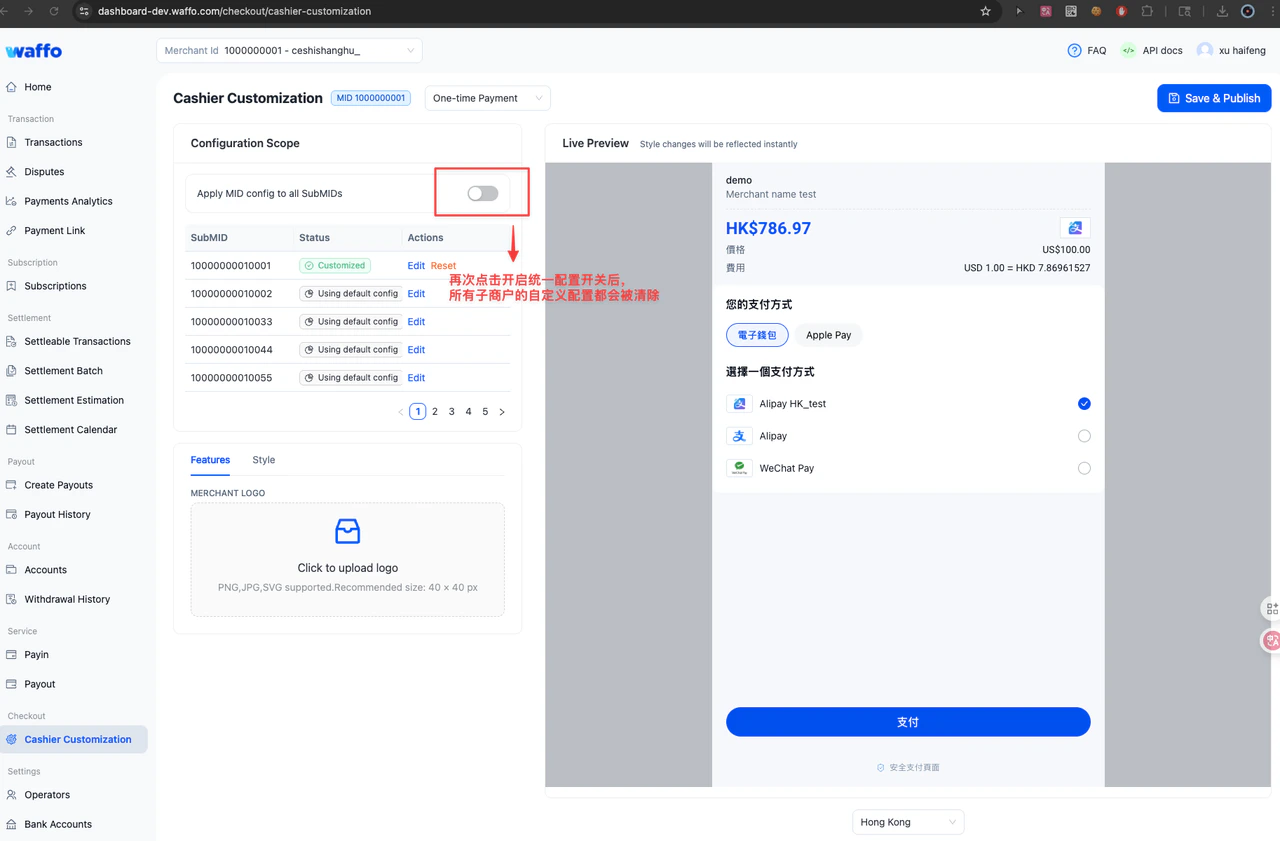
Configure sub-merchant styles
If your account has sub-merchants (SubMIDs), the main merchant (MID) configuration applies to all sub-merchants by default.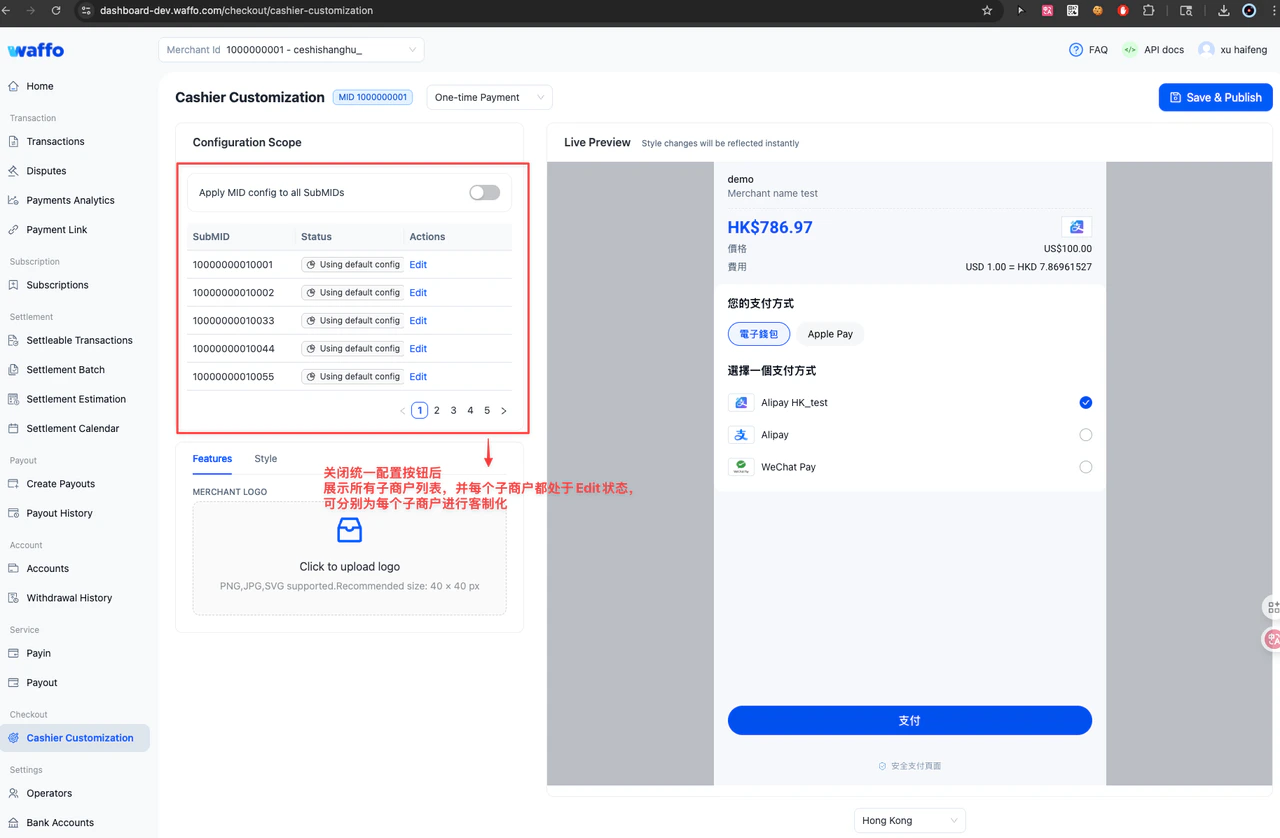
1
Disable unified configuration
Turn off Apply MID config to all SubMIDs.
2
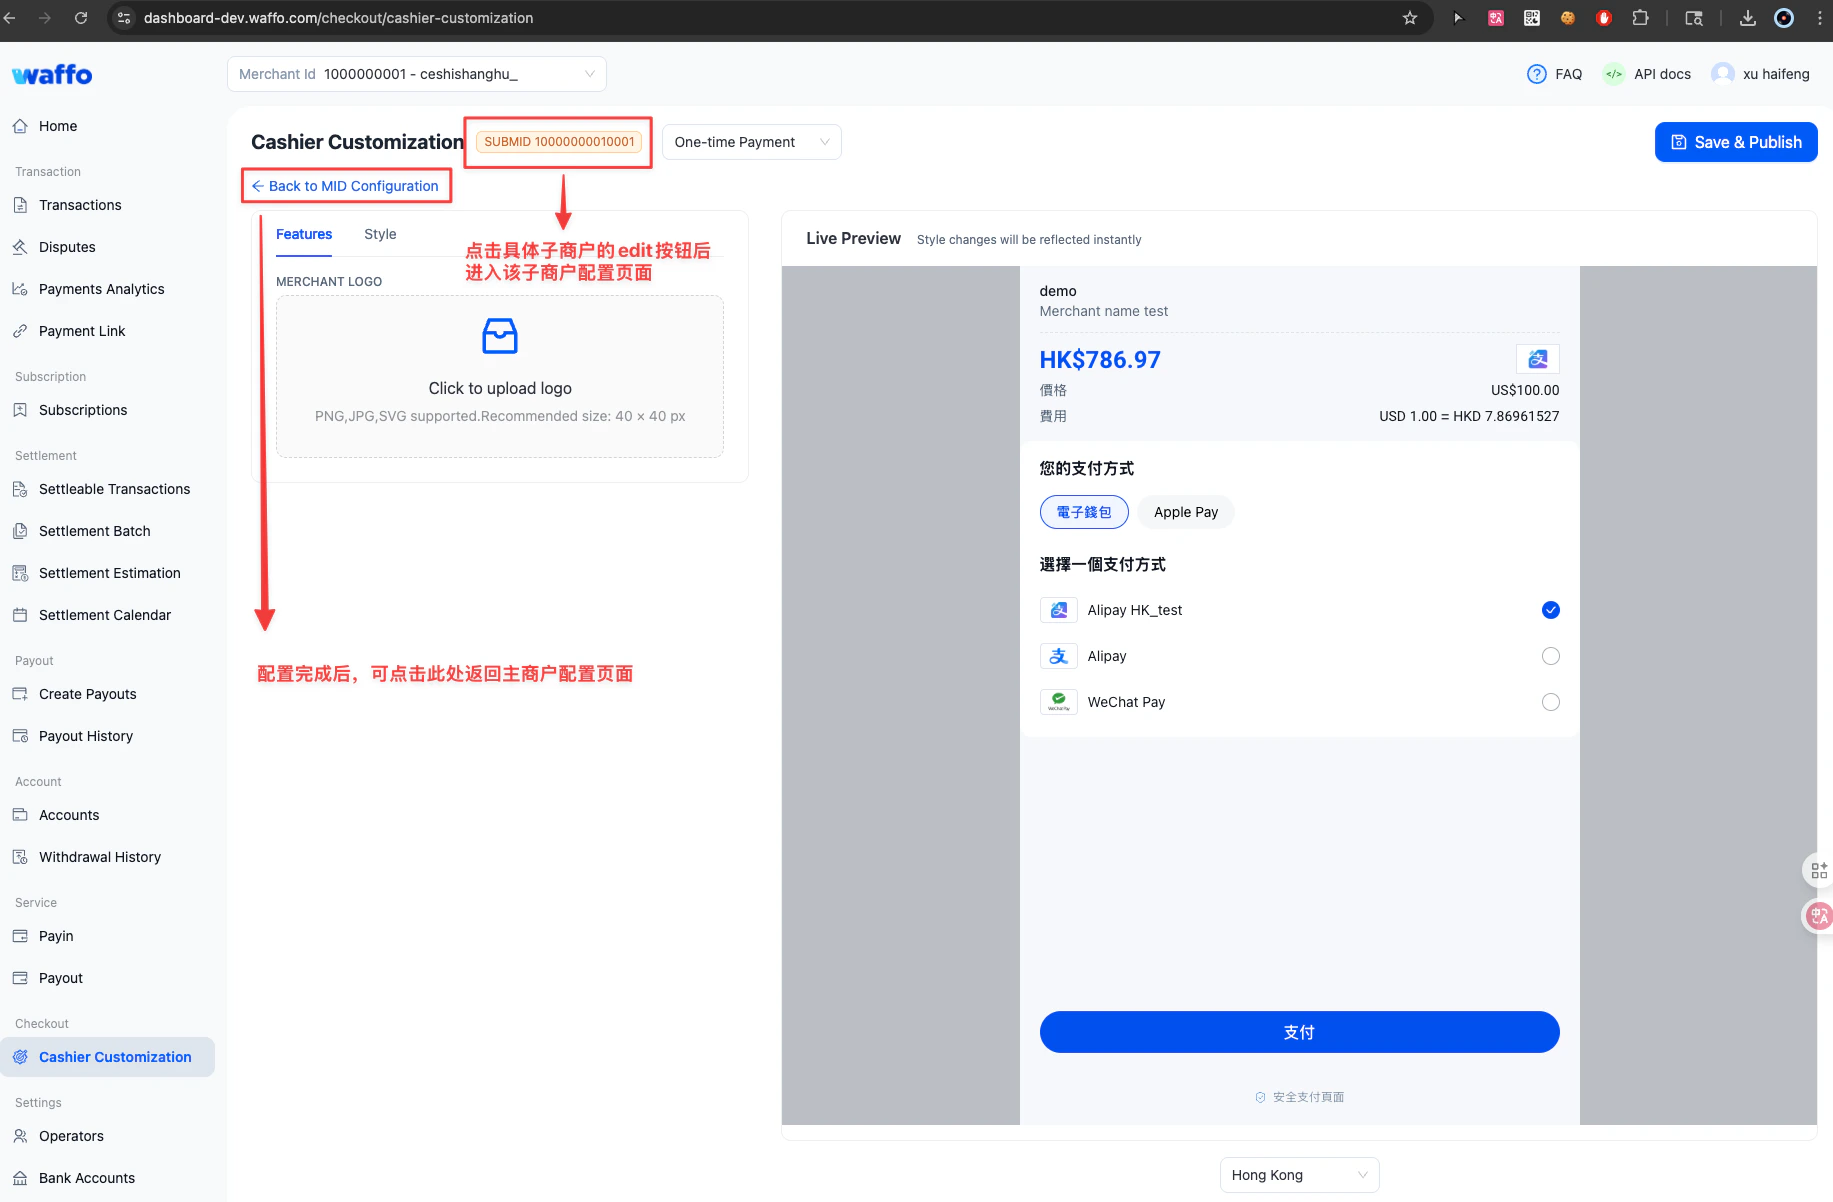
Edit a sub-merchant
Click Edit in the sub-merchant list.
3
Configure the style
Configure Features and Style in the same way as the main merchant.
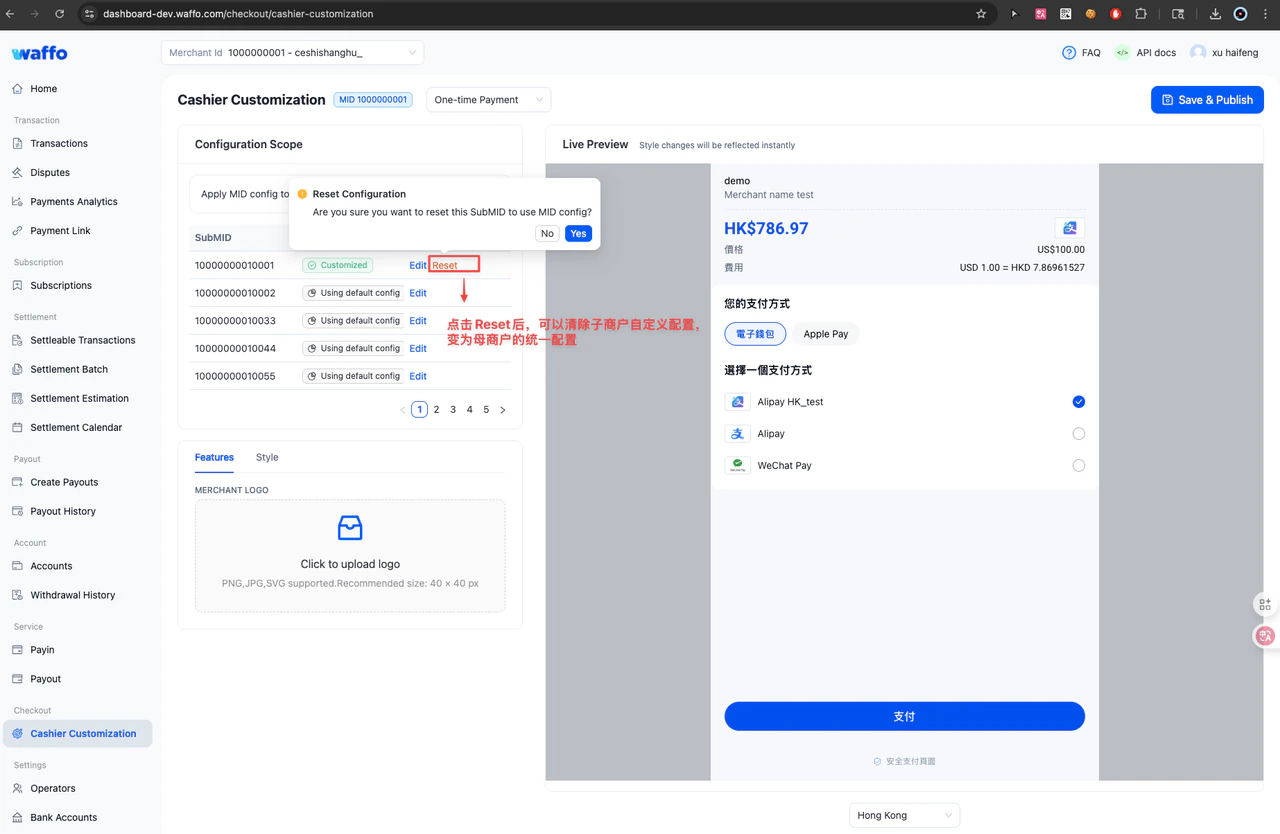
4
Save the configuration
After saving, the sub-merchant status is shown as Customized.
Save and publish
Changes on the page apply only to the current preview. They are not automatically applied to real orders. After you click Save & Publish:- The current configuration is saved.
- Newly created orders use the latest configuration.